

The Review Badge module displays a compact summary of your customer ratings. Use it on a landing page, beside a call to action, or in a header or footer.
The badge calculates its own results and does not need a Reviews loop.
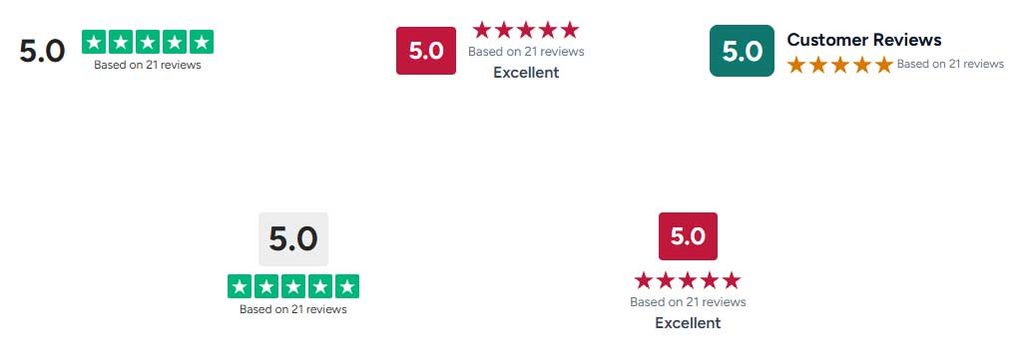
Step 1: Add the module
Open your page or Theme Builder template in the Divi Visual Builder.
Insert the Review Badge module, or add a badge Starter Layout from your Divi Library.
Step 2: Choose your review source
Open Content → Source and choose:
- All Reviews: Use all eligible rated reviews.
- Selected Collection: Use reviews from a specific collection.
If you choose Selected Collection, select the collection below.
The badge’s source is independent of nearby review cards, carousels and their filters.
Step 3: Choose a badge layout
Under Content → Layout, select a Badge Layout:
- Score Block
- Rating Card
- Reviews Label
Choose the style that fits your page, then customize it in the Design tab.
Step 4: Customize the text
Open Content → Text to edit:
- Heading
- Rating Label
- Review Count Text
The rating label is your own text, such as “Customer Rating.” It does not automatically change when the average rating changes.
Keep the {count} placeholder in your Review Count Text wherever you want the calculated number to appear.
For example:
Based on {count} reviews
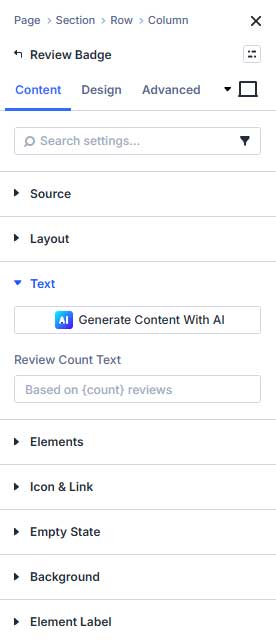
Step 5: Choose which elements appear
Under Content → Elements, enable or disable:
- Average Rating
- Stars
- Review Count
- Heading
- Rating Label
- Icon
This lets you create a detailed badge or a simpler display containing only the elements you need.
Step 6: Add an optional link
Open Content → Icon & Link.
Enter a Link URL if you want the badge to link to your reviews page or another destination.
Choose whether the link opens In The Same Window or In A New Tab.
If you enabled the icon, select it here too.
Step 7: Style the badge
Use the Design tab to adjust:
- Badge Layout: Direction, alignment, gaps and padding.
- Score Block: Score colors, size, corners and internal padding.
- Stars: Plain or Boxed style, size, colors, padding and spacing.
- Heading, Rating Label and Review Count: Typography.
- Icon: Color, size and spacing.
Check the design at desktop, tablet and phone widths.
Step 8: Configure the empty state and save
Under Content → Empty State, choose Show Message or Hide Module when there are no eligible rated reviews.
Save your page or template, exit the builder, and check the badge and its link on the frontend.
Which reviews contribute?
The badge includes published, non-password-protected reviews with a valid rating from 1 to 5.
Pending, draft, private, trashed and unrated reviews are excluded from its calculations.
Does the badge add Structured Data?
Placing a badge on a page, header or footer does not automatically add Structured Data.
Configure that separately under Reviews → Structured Data. See the Structured Data guide for details.